Advanced - Implement Effects
The great thing about effects of that they can be added to any items or abilities the character has! This means that you could create a Hat with the same effects as a Feat, or a weapon that grants you skill bonuses. For the Sheet, if an effect is available, the 'source' of that effect is irrelevant!
Effects can be added to almost everything. The easiest way to learn HOW to create effects is to learn by example. The process of adding effects is similar, whether you are adding an effect for a weapon, of for a feat.
We assume you are familiar to 'navigating' through the Sheet to get to the desired worksheet (if not, you might want to stay out of the advanced User Guide!!).
Example: A Magical Armor
In this example, we will create a new suit of Armor called Zartan's Chainmail, based on a standard chainmail, but with these magical effects/properties:
- +2 enhancement bonus to Armor Class
- Resistance to Electricity 10
- Slick Special Ability
Step #1 - Getting the base armor
| The first thing to do is to create a 'base' armor from which our new Armor will be made. In TOS+, go to the Gear Worksheet. Click on the blue Armor quicklink in the upper left to jump to the Armor table. When you see the Armor table, you will notice another quicklink called Click HERE to add Custom Armors!. Click on it to jump to the yellow area where a custom Armor can be added.
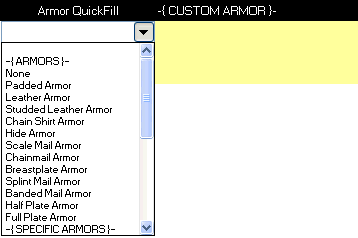
The image on the right shows what happens when you click on the first arrow drop down of the Armor QuickFill. This is a way to 'fetch' all the data for an existing Armor, so that you do not have to start filling the information from scratch. Select Chainmail Armor from that list. After a moment, the yellow area will fill with the data from the 'basic' chainmail armor. Now you can start filling in the information for your custom armor, replacing the data as needed. Here we will focus on adding the desired effect - and how to proceed! |
 |
Step #2 - Basic information
After TOS+ has auto-filled the information for the 'basic' chainmail armor, you are all set to fill in the details for Zartan's Chainmail. The first thing to do would be to name the armor Zartan's Chainmail. After this, go through the rest of the column to change the desired information. Here is an example for Zartan's Chainmail: (Gray cells highlight the changed column from the base armor information)
| Column | Content |
|---|---|
| Armor (that's the name!) | Zartan's Chainmail |
| Cost (gp) | 123,456 |
| Base Armor Bonus | 5 |
| Enhancement Bonus (magic) | 2 |
| Max Dex Bonus | 2 |
| AC Check Penalty | -4 |
| Arcane Spell Failure (%) | 30 |
| Medium Weight | 40 |
| Adjusted Weight (this formula should be left alone!) | 40 |
| Description (use whatever you wish) | Found in the Grey Castle |
| Armor Category | Medium |
| Armor Family | Chainmail Armor |
This covers the basic information for the Armor. Note that for Armors, the magical enhancement bonus is a column which can be directly filled in. Now the fun part; creating the effects that will make Zartan's Chainmail truly magical!
Step #3 - Adding the effects
The rest of the columns in the Armor table pertains to Effects (starting with Conditional Effects and Abilities). This is where the Effect part of the Armor is added. Note though that the armor table has a column to enter any enhancement bonus to armor! This means that you would not need to specify an effect; just enter the enhancement bonus for your magical Armor in that column.
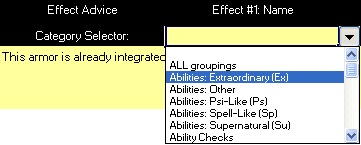
Now for the Slick effect of our Armor; the rules says that it provides a +5 competence bonus on its wearer’s Escape Artist checks. First, we change the Category Selector to Skill and then for the name of the second effect, we choose the Escape Artist skill. The type for this effect is stated as competence while the modifier is 5.
The table below gives a résumé of the effects we added for our special armor!
| Column | Content |
|---|---|
| Conditional Effects and Abilities | Zartan's Chainmail |
| Permanent Effect? | Yes |
| Effect Advise | This armor is already integrated! |
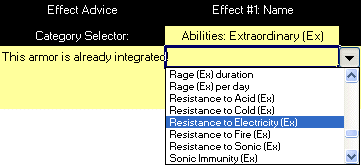
| Effect #1 Name | Resistance to Electricity (Ex) |
| Effect #1 Type | Max Value |
| Effect #1 Modifier | 10 |
| Effect #2 Name | Escape Artist |
| Effect #2 Type | Competence |
| Effect #2 Modifier | 5 |
| Effect #3 Name | - |
| Effect #3 Type | - |
| Effect #3 Modifier | - |
BACK to Effects


